Nur’s Nook: Make a Balanced Bird
“Equity is the most fundamental among human virtues.”
—Bahá’u’lláh
It’s amazing how different birds have just the right wings to keep them in balance. Some seabirds, like gulls, have long, narrow wings for soaring over the ocean. Many songbirds, like robins, have shorter, rounded wings that help them quickly move from perch to perch. Little hummingbirds rotate their tiny wings fast enough to hover at flowers.
Just as birds have different wing shapes to keep them steady, we all enjoy more balanced lives when we practice equity. Equity doesn’t mean we’re all the same. It means we’re all noble, and we should be treated with respect and have fair opportunities.
We can work to fix disadvantages caused by racism or prejudice. For example, many kids of color don’t have computers they need to complete homework. Or they don’t have chances to take music or other cool classes. When we end inequities like these, all kids can fly toward their goals.
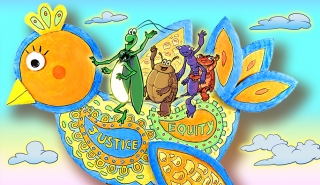
Create a colorful bird with virtues that help us soar to new heights!
You’ll Need: Template (printed from PDF), thick cardboard, pencil, scissors, duct tape, tacky glue, ruler, paintbrushes, water for painting, white and colorful acrylic paint, black permanent marker, small rocks
What You Do:
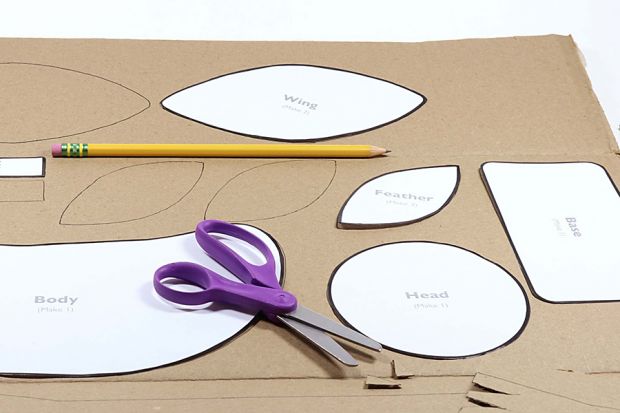
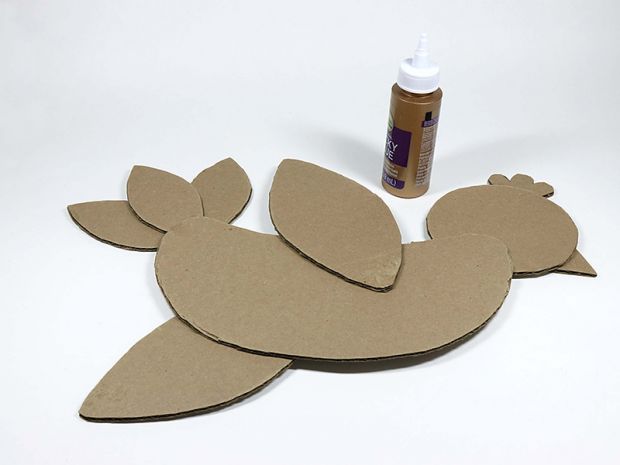
Step 1: Cut out shapes from bird template.

Step 2: On cardboard, trace each shape. For wing and support, make two of each. Make three feather shapes and four legs. Cut out all cardboard shapes.
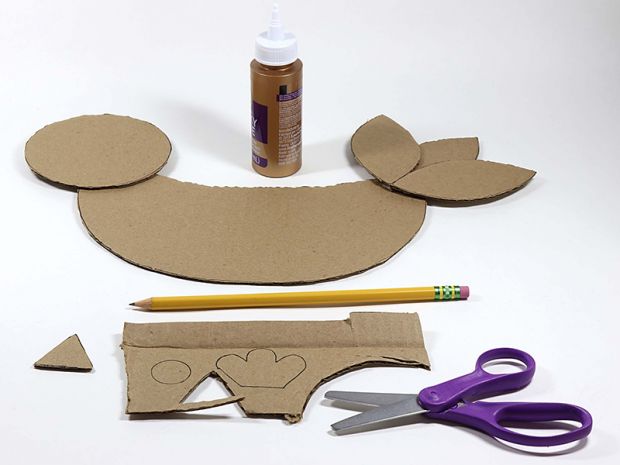
Step 3: Glue circle for bird’s head to one end of body. For tail, glue feather shapes to other end of body. On cardboard scraps, draw and cut out head feathers, eye, and beak. Glue to bird.
Step 4 A: Glue end of one wing to center of body, slightly angled down toward tail.
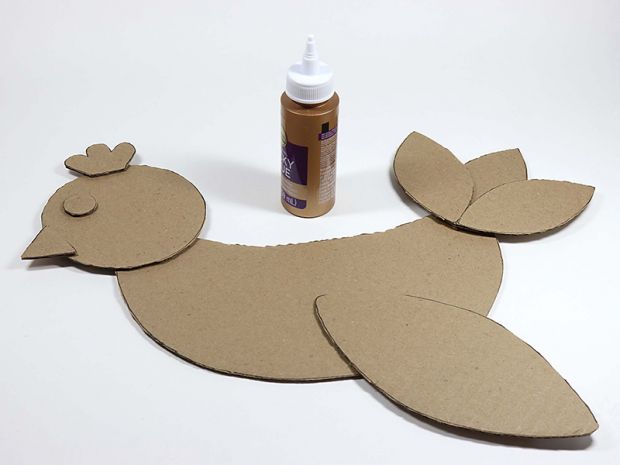
Step 4 B: Flip bird over. Glue end of other wing to center of bird’s back.
Step 5: Glue one leg shape to another. Repeat to make two sturdy legs. Glue 1" (2.5 cm) of a leg’s end to bird’s belly. Repeat for other leg, so legs extend down to the same length and are spaced about 1½" (3.8 cm) apart. Let dry.
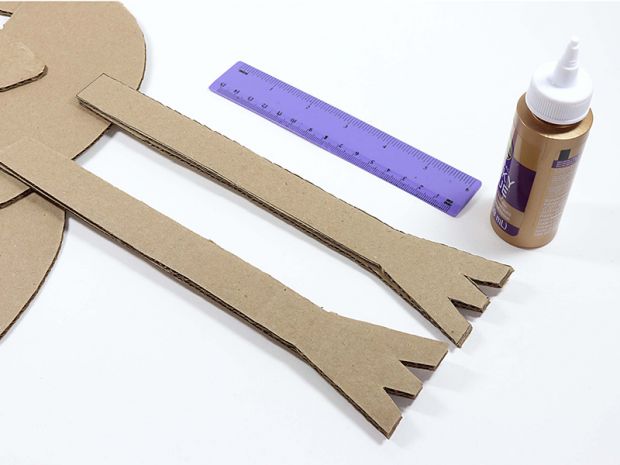
Step 6: Fold both feet at right angles where foot and leg meet (shown by dotted line on pattern).
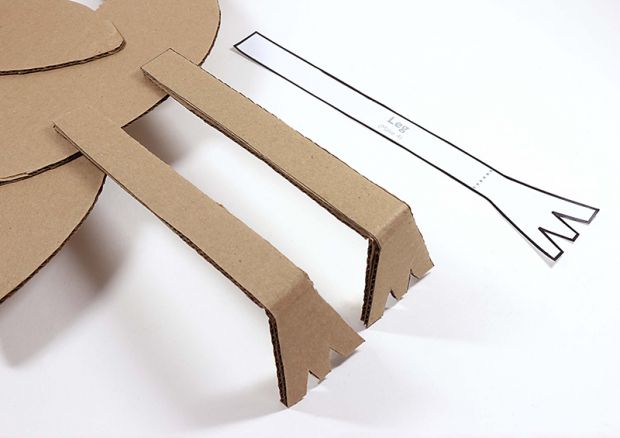
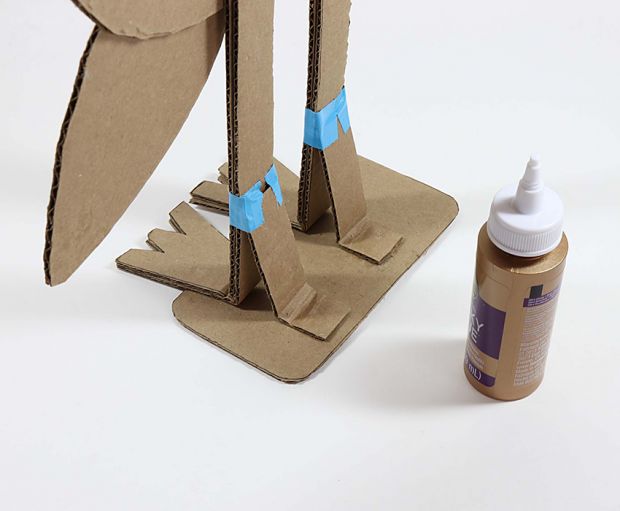
Step 7: Fold right angles at 1" (2.5 cm) from end of each support, to make tabs (shown by dotted line on pattern). Lay supports on legs so tab and feet creases align and folds go in opposite directions. Tape supports to legs.
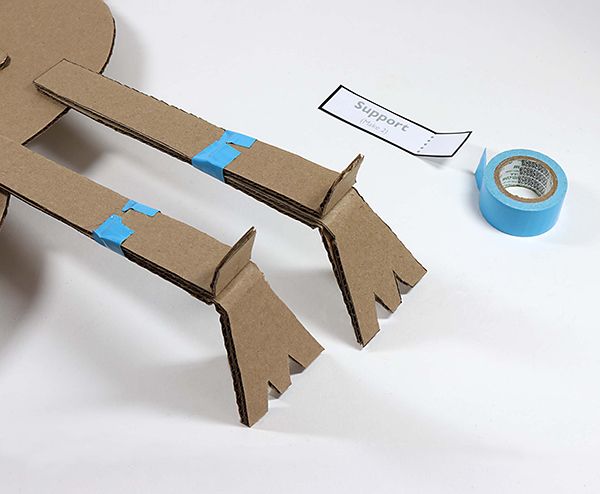
Step 8: Glue heels of bird’s feet and support tab bottoms to base. Tabs should extend back about ¾" (1.9 cm) from each foot so bird can stand on its own.
Step 9 A: Be very gentle with legs and supports. Paint front side of bird with white undercoat. Let dry.
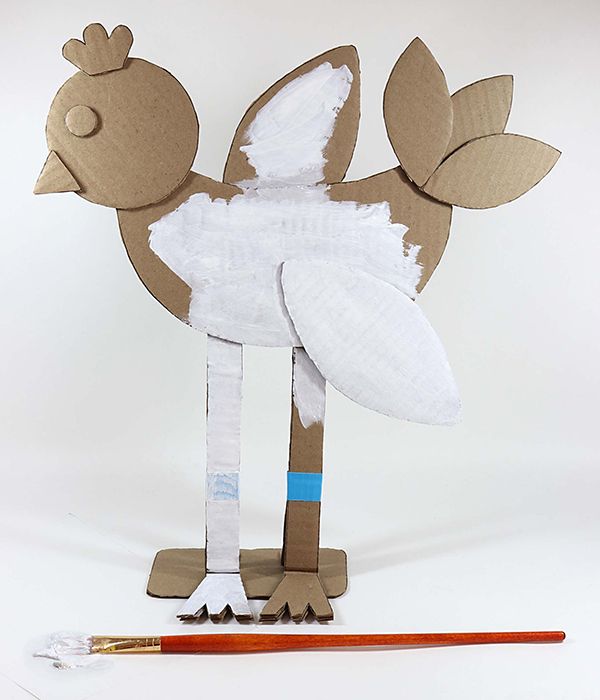
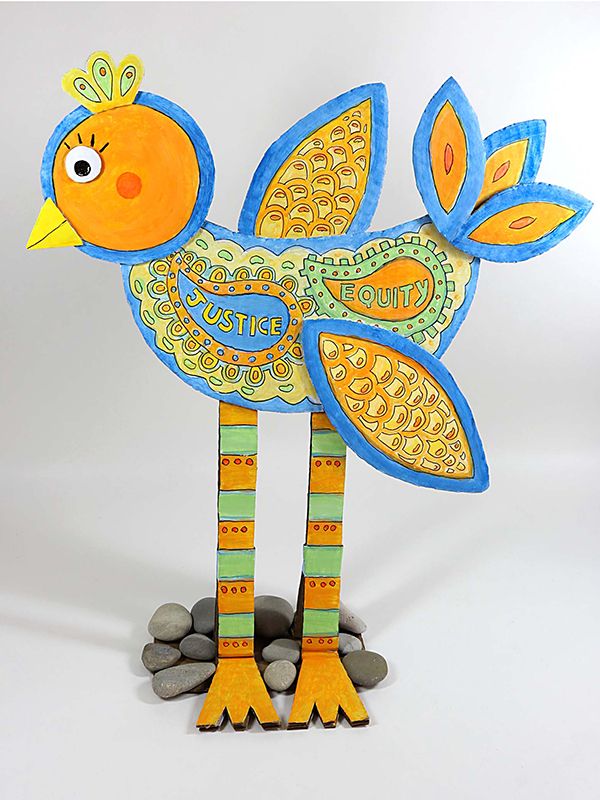
Step 9 B: Carefully draw designs on bird in pencil. Include virtues and images that can uplift your community. Add colorful paint. Let dry. Use black marker for details.

Step 10: Glue rocks and pebbles onto base for more support. Now it’s ready to display in a room, window, or weatherproof outdoor area.
To create this bird, download the template for bird shapes.
For a printable version, download a PDF.
Characters493 Nur152 Arts and Crafts223 Crafts213 Birds53 Equality20 Elimination of Prejudice118 Race Unity223 Justice138 Balance38 Wings16 Communities57