Nur’s Nook: Get Inspired—Make a “Nur” Pencil Case

“Let them share in every new and rare and wondrous craft and art.”
—‘Abdu’l-Bahá
Have you ever thought you’d lost your ability to make arts and crafts? Maybe you struggled to come up with fun ideas, felt distracted, or were afraid that projects wouldn’t come out the way you’d imagined. When blocks like these smother your creative spark, try some tips to light your way.
Check out exhibits, films, or books with exciting topics. Turn on uplifting music and draw or write the first thing that comes to mind. Use different supplies or recycled objects to create practical tools or a gift. Be open to experimenting or making mistakes—you may improve an idea or learn a whole lot more.
It also helps to set aside a specific time and place to create. Surround yourself with people, items, quotes, or photos that empower you or fire up your curiosity. Create this cool pencil case to kindle your creativity—or design one of your own!
You’ll Need: Printer paper, ruler, pencil, scissors, felt (dark green, light green, white, black, pink), tacky glue, clear tape, 33.8 fl. oz. (1L) clear plastic bottle with cap, green plastic bottle, 1 thin black and 1 thick green pipe cleaner, 12" (30.5 cm), permanent black marker, hole punch, optional: craft knife; pencils, markers, eraser to store in your case
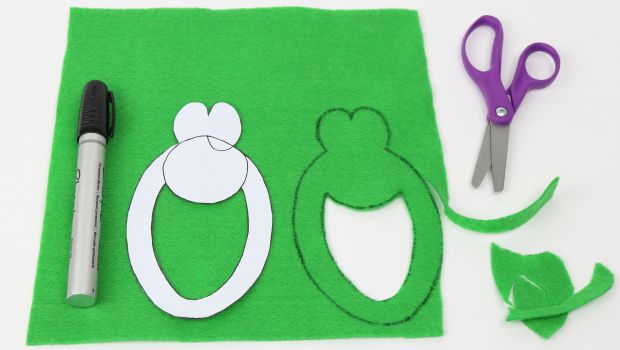
Step 1: Fold paper in half. From fold, draw 4¾" tall x 1½" wide (12.1 x 3.8 cm) half oval for head. Draw 1¼" (3.2 cm) tall oval that touches fold and slightly overlaps top of head for eye. Cut out on exterior lines and unfold.

Step 2: As a guide, draw 1¾" (4.4 cm) circle from top of large oval down. Draw mouth by adding ½" (1.3 cm) border at sides of oval, under circle. Cut out mouth.

Step 3: Trace pattern on dark green felt. Cut out.
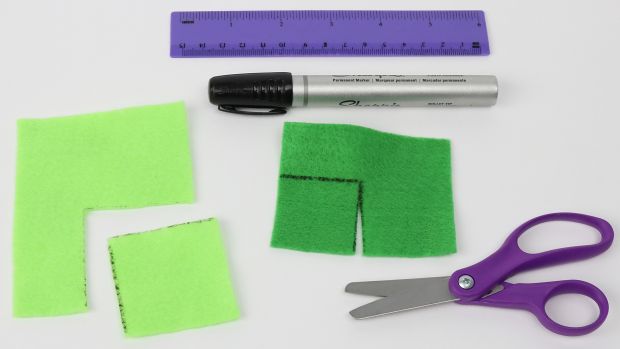
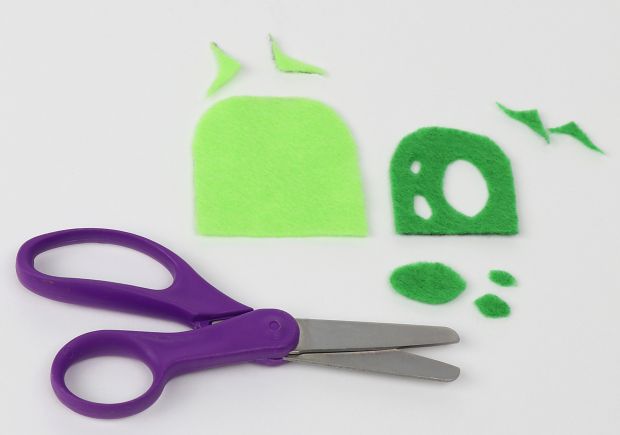
Step 4: For torso, draw and cut out 2" (5 cm) light green and 1½" (3.8 cm) dark green felt square. Round top corners. Cut small oval shapes out of dark felt for “glow” highlights.
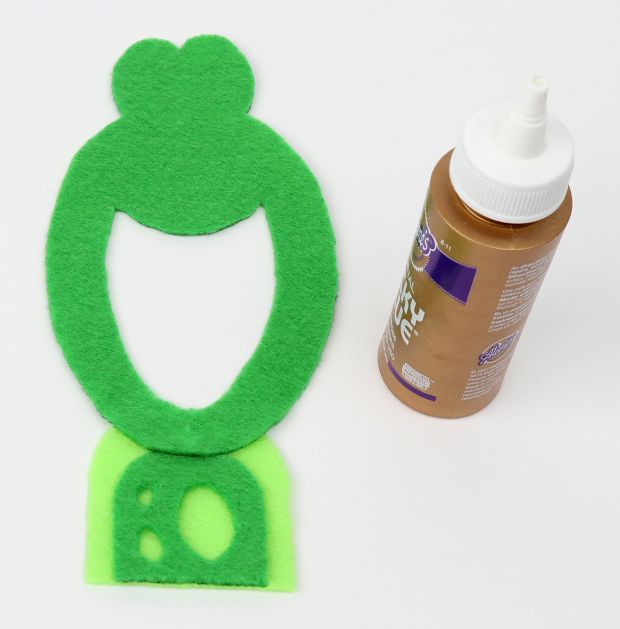
Step 5: Glue torso shapes together so bottom edges meet. Glue chin on top edge of body. Let dry.
Step 6: Lay face on clear bottle so bottom of torso and bottle’s bottom align. Trace mouth onto bottle with marker. With adult’s help, cut out plastic mouth.
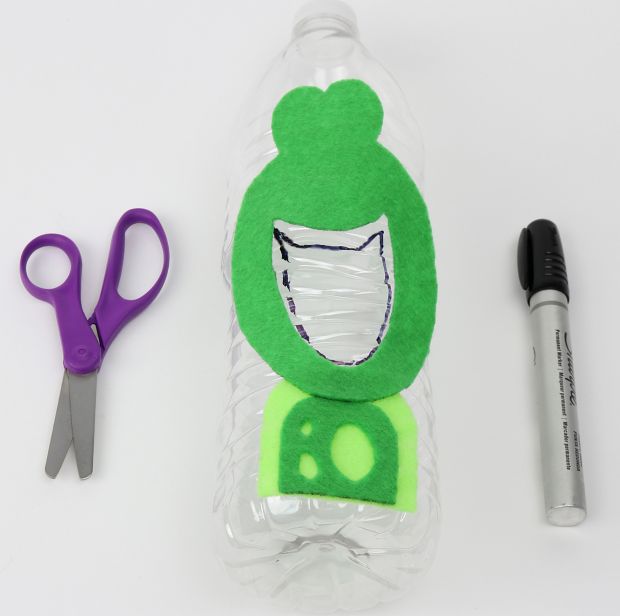
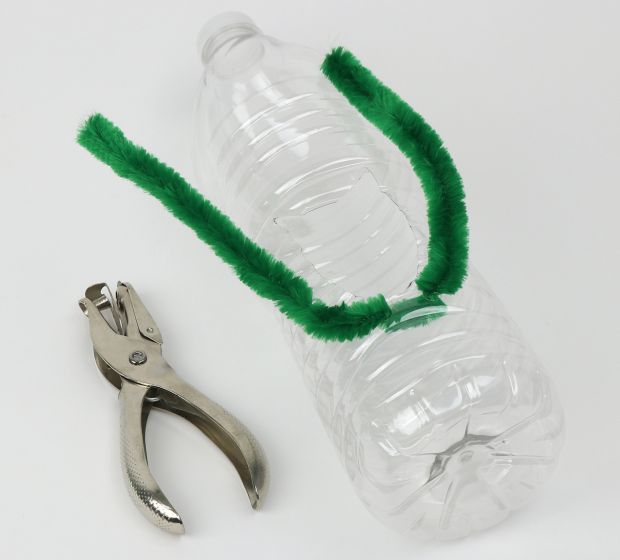
Step 7: Punch two holes in bottle below mouth. Thread thick pipe cleaner through for arms.
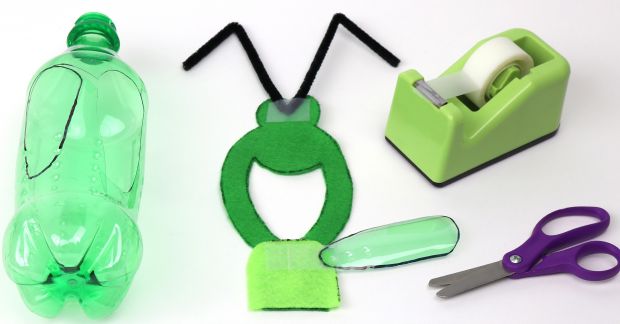
Step 8: Fold thin pipe cleaner in half. Tape behind eyes and fold ends down for antennae. Draw wings with marker on green bottle. With adult’s help, cut out wings so black outlines show. Tape wings behind Nur’s shoulders.
Step 9: Glue Nur (avoiding wings, antennae, and arms) to bottle, so felt mouth aligns with mouth opening. Pull pipe cleaner arms in front of wings. Cut out and glue on felt eye and mouth details. Let dry.
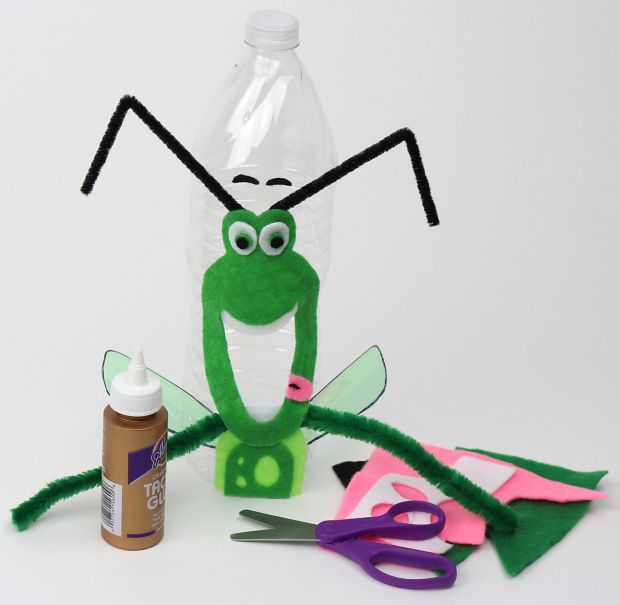
Step 10: Load pencils through bottle top or mouth. Twist end of arm around eraser. Repeat with other arm for pencil. Bend pipe cleaners at “elbows.”

For a printable version, download a PDF.
Characters493 Nur’s Nook100 Nur152 Crafts213 Arts and Crafts223 Inspiration18 Creativity296