Nur’s Nook: Make a Cool Paper Craft

“The supreme need of humanity is cooperation and reciprocity.”—‘Abdu’l-Bahá
It’s fun to combine paper cutouts into amazing new shapes and designs. By folding and twisting flat pieces of paper together, you can create a sturdy sculpture—even without glue or tape.
In a similar way, when we team up with others in unity, each person’s skills and talents combine to make a stronger service project. For example, if your family is planning a community or holy day event, your siblings may be super at singing or sharing stories. Your parents might contribute delicious desserts. You can help by making this cool 3D party decoration. Each paper shape can represent a different talent or strength that someone brings to the group’s well-built event.
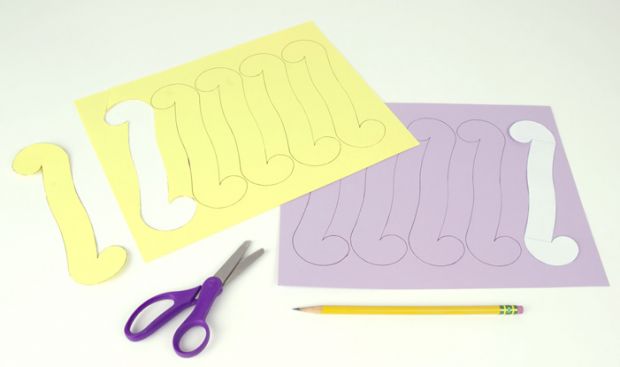
You’ll Need: Printed pattern*, pencil, scissors, two sheets of 8½" x 11" (21.6 x 27.9 cm) thick paper in two different colors, 12" (30.5 cm) string for hanging (optional)
Step 1: Cut out the pattern. Take care to cut exactly along the solid line, especially at the hooked ends of the shape.

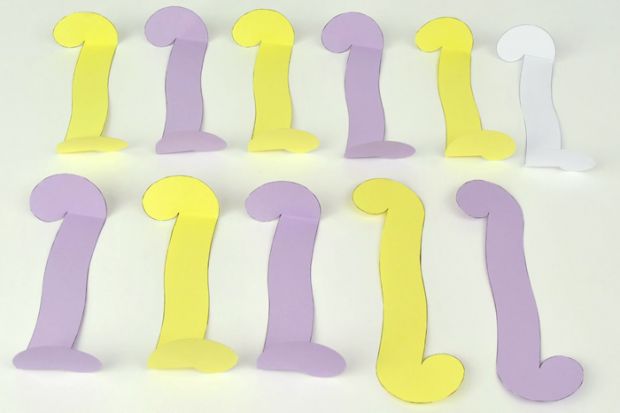
Step 2: Trace pattern five times on each color of paper, so you have 10 shapes. Carefully cut out all shapes.
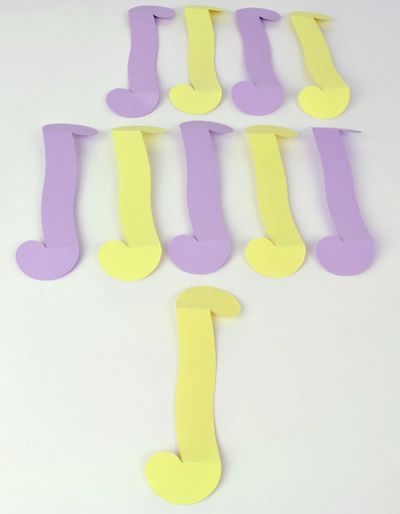
Step 3: With all papers facing in the same direction, fold each hooked end upward. Use the dotted line on the pattern as a guide.
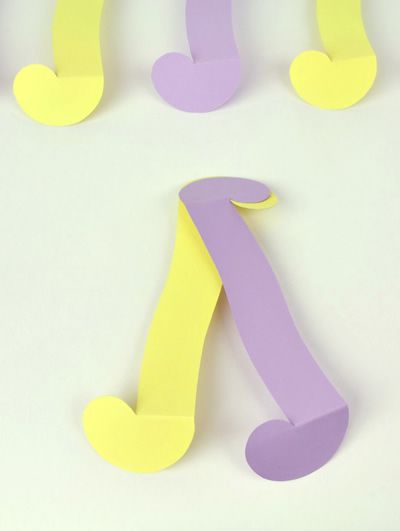
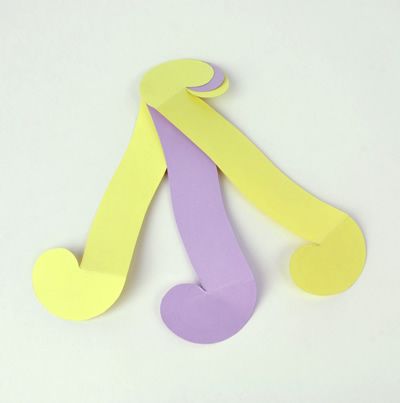
Step 4a: Flip papers over so they look similar to an “S” shape. Put one paper in front of you.
Step 4b: Place new paper of the other color on top, and rotate its tip so lower hooks are about 1½" (3.8 cm) apart. For upper hooks, the first hook should slightly overlap new hook.
Step 5: Repeat Step 4b to continue adding papers while alternating colors. Hold papers together at linked hooks. When all papers are added, the linked hooks form a circle.
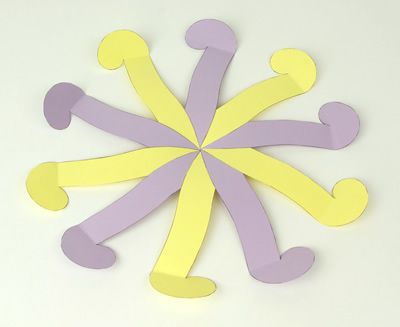
Step 6: Hold papers together at center of circle. Rotate paper ends so they are evenly spaced apart to form wheel shape. Flip paper wheel over, keeping ends evenly spaced.
Step 7a: Bend tip of paper that’s closest to you so it’s about 3" (7.6 cm) above center of wheel.
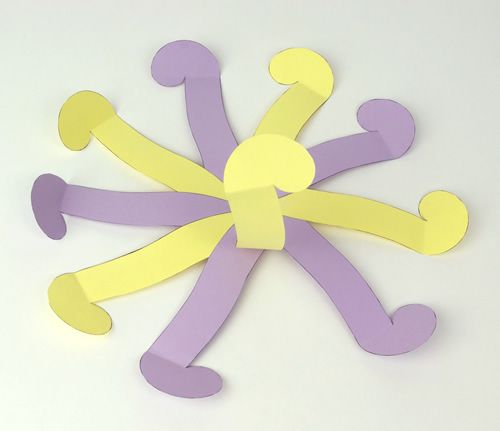
Step 7b: Hold wheel down on table. Bend up the next paper in counterclockwise order, and slide its hooked end over the previous paper’s hooked end. About a ¼" (.6 cm) of the preceding color should be visible.
Step 8: For remaining papers, repeat Step 7b while pushing inner top edge of each new paper under first paper’s hook.
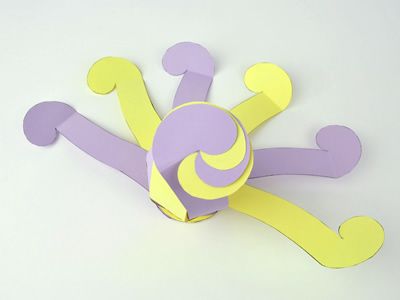
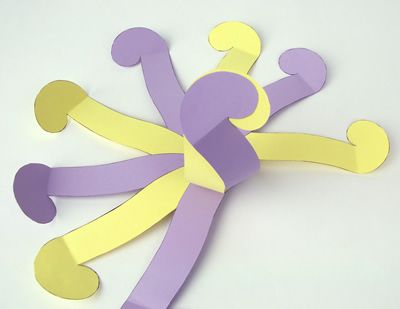
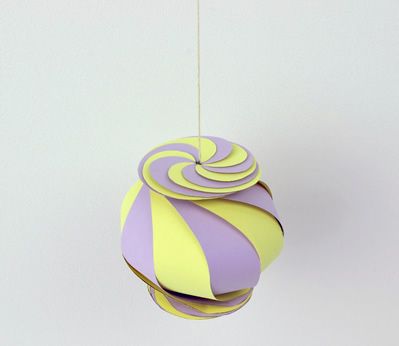
Step 9: Push papers, if necessary, to space them evenly apart. Optional: Knot string’s end. Use pencil tip to widen and carefully push knot inside central hole at top of decoration. Now it’s ready to hang!

For a printable version, download a PDF.
*Craft and pattern by Philip Chapman-Bell
Nur’s Nook100 Nur152 Art55 Parties11 Origami14 Creativity296 Arts and Crafts223 Characters493 Family121 Unity252 Cooperation107 Teamwork141