Nur’s Nook—Cool Changes: Make a Snow Mobile
“Through their individual transformation and through their combined efforts they will transform the conditions of the world...”
—Bahá’í Writings
Snowflakes are a cool example of transformation! They start out as clouds, which are made of water vapor—water in gas form. When a cloud gets cold enough, the water vapor can freeze around a bit of dust and become an ice crystal. As a crystal falls to the ground, it may bump into other ice crystals or into shifts in temperature, moisture, and wind. These changes can transform it into a glistening, starlike snowflake.
Isn’t that awesome? Snowflakes inspire me to be more flexible. When my fun plans get canceled or stress piles up, I try to relax and go with the flow. Building snow sculptures and spending time with my family and friends for fun and for prayers helps me chill out.
When you have a challenge, what helps transform your outlook? Create this craft with your family and explore crystal-clear ways to brighten cloudy days.
You’ll Need: White and colorful card stock, white and colorful paper in 3" (7.6 cm) squares, scissors, pencil, tacky glue, ruler, clear tape, markers, a stick, string or thin ribbon
What You Do:
Step 1a: Fold paper square in half so corners meet.
![]()
Step 1b: Fold in half again so short edges of triangle meet.
![]()
Step 2a: Cut slit from center of triangle’s short edge, stopping ¼" (.6 cm) before opposite edge.
![]()
Step 2b: Repeat cut on left and right of slit, so three slits are evenly spaced.
![]()
Step 3: Open paper. Put pencil tip in center of paper. Roll corners of central flaps around tip to form tube shape. Secure with glue. Remove pencil.
![]()
Step 4: Flip paper over. Roll corners of second pair of flaps into a tube shape and secure with glue. Use pencil for support, if needed.
![]()
Step 5a: Repeat Step 4 for corners of third pair of flaps.
![]()
Step 5b: Flip paper over and glue corners of outer flaps together.
![]()
Step 6: Repeat steps 1–5 to make five more snowflake branches. Glue two branches together at sides and one end. Continue adding branches, letting each one dry before you add another.
![]()
Step 7: Follow Steps 1–6 to make more snowflakes. Optional: Make some with 2" (5.1 cm) or 4" (10.2 cm) squares.
![]()
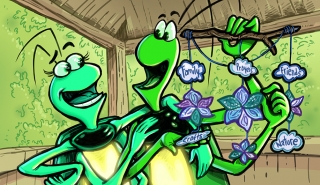
Step 8: Cut cloud shapes from cardstock. Glue together cloud shapes of different sizes and colors if you wish. With markers, write on each cloud a word that helps you transform your outlook about a challenge (examples: family, friends, nature, or prayers).
![]()
Step 9: Tape end of a piece of string to top of each snowflake and cloud. Strings should vary in length.
![]()
Step 10: Knot top of of some strings to stick. Tape any remainders to shapes you’ve hung. Pieces shouldn’t touch when suspended. Trim string ends. Cut a string that’s twice the length of stick and knot at stick’s ends for hanging.
![]()
For a printable version, download a PDF of this craft
Characters493 Nur152 Arts84 Arts & Crafts25 Crafts213 Snow4 Flexiblity10 Paper39 Transformation38 Celebrate44 Nur’s Nook100