Nur’s Nook—Be Inclusive: A Feeder for Diverse Birds
Birds of various species and colors wing their flight and feed together without a trace of enmity . . .”
—‘Abdu’l-Bahá
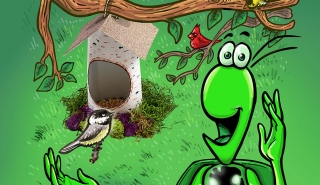
I love to hang out with my bird friends at this feeder I made. Carmine, a bright red cardinal, has fun with Chip, a black-capped chickadee, and Glitter, a goldfinch. They may be different species with feathers that come in diverse colors, but our friendship is taking off!
It’s fun having great pals from lots of cultures and backgrounds. Getting to know them helps squash stereotypes—assumptions that label someone based on the group they’re in, instead of who they really are. For example, some people say having a “birdbrain” means you’re not very clever, but my bird friends are super smart with navigation and communication. They build awesome nests, too. Create your own fun feeder, and welcome new flocks of friends!
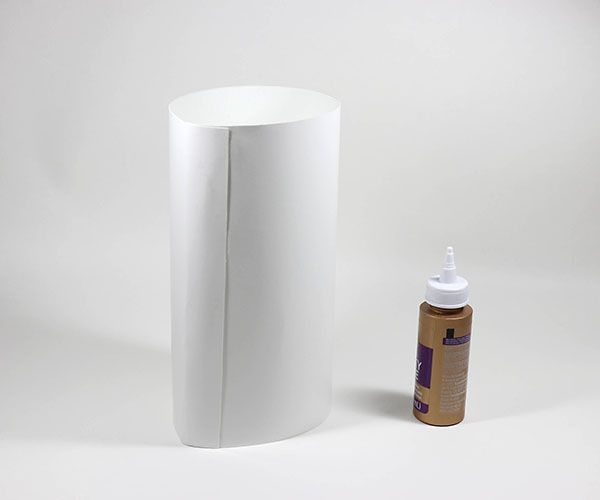
You’ll Need: 8" x 14" (20.3 cm x 35.6 cm) heavyweight poster board paper (coated on one side), tacky glue, pencil, ruler, scissors, duct tape, large nail, 3.75" (9.5 cm) circle for tracing, 5.5" x 7.5" (14 cm x 19.1 cm) piece of cereal or cracker box, 5.5" x 7.5" (14 cm x 19.1 cm) sandpaper, string, 2 small coated paper plates, black and earth-toned permanent markers, approx. 10" (25.4 cm) sturdy stick, spoon, birdseed for diverse birds, stapler, nature items (such as moss or raffia)
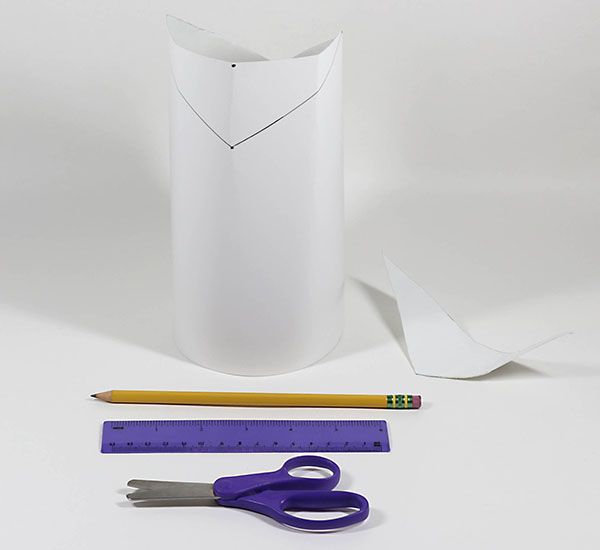
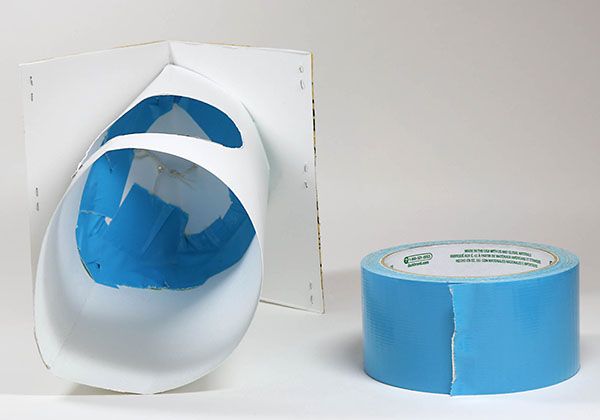
Step 1a: Roll short edges of poster board into a cylinder shape (so coating faces outside) and secure with glue. Let dry.
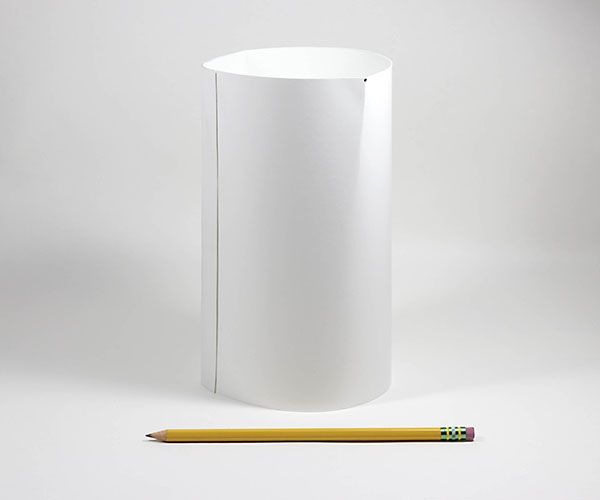
Step 1b: Press glue-free edges together to form creases at top of cylinder. Mark top of each crease with a dot.
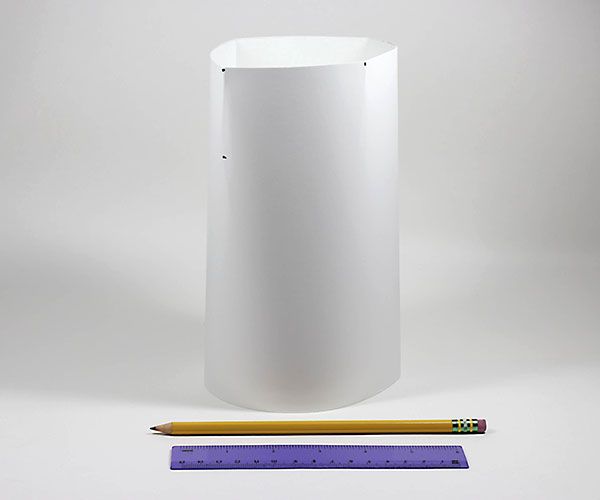
Step 2a: Repeat Step 1b in opposite direction, so all dots are evenly spaced. Make a dot 2" (5.1 cm) below each new dot.
Step 2b: With ruler, draw lines that connect first pair of dots to lower dot on each side. Cut along lines to make roof shape.
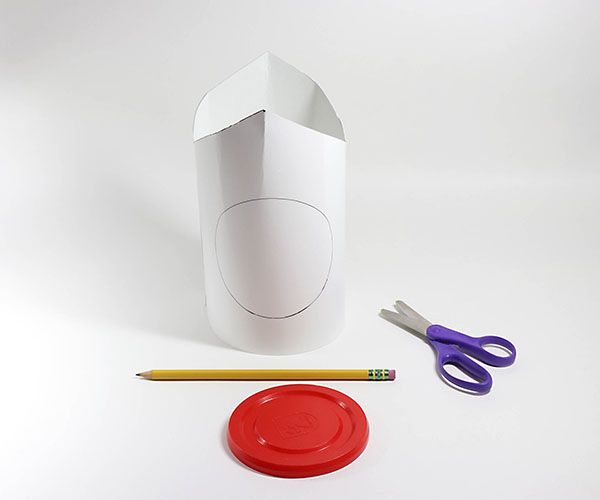
Step 3: Trace circle onto front of bird feeder, centered 1¼" (3.2 cm) from bottom of cylinder. Cut out circle.
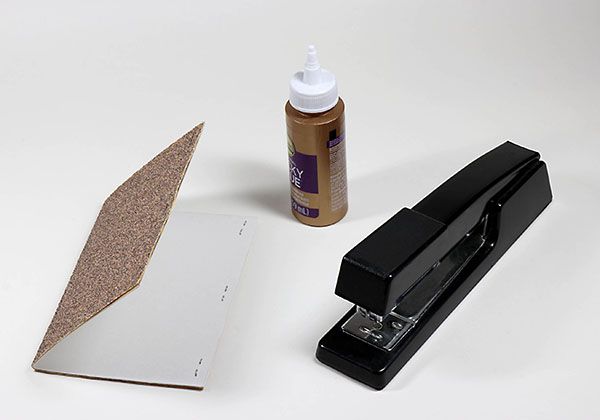
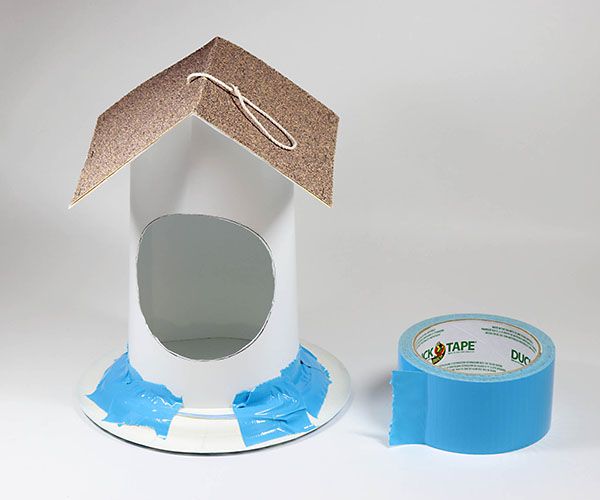
Step 4a: For rooftop, glue sandpaper to cover the coated side of food box. Reinforce edges with staples. Fold rooftop in half so uncoated short ends meet. Unfold and let dry.
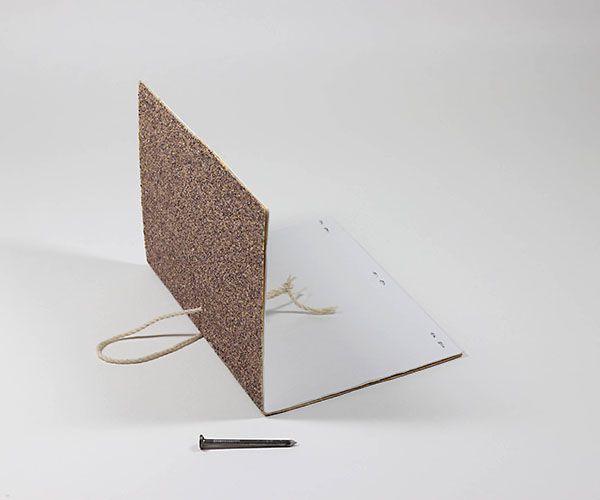
Step 4b: Carefully twist nail to punch a hole through each flap of rooftop, centered about ½" (1.3 cm) from fold. Thread string through holes. Knot ends to make loop for hanging.
Step 5: Reach inside bird feeder to securely tape rooftop to roof. Press bird feeder upside down in your lap or hand to make bonds tight.
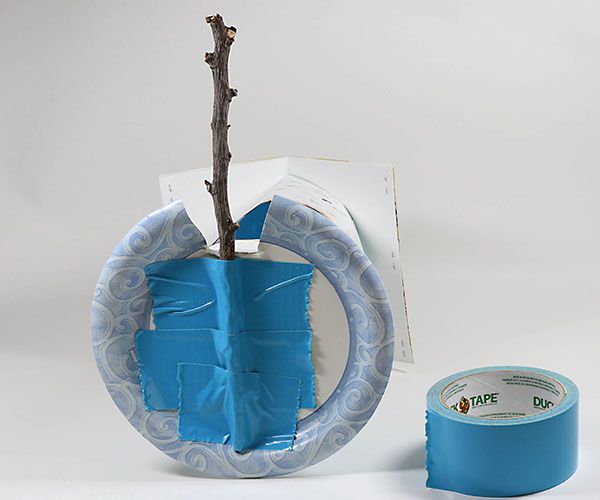
Step 6a: Cut rim off first paper plate. Glue back of remaining circle to back of second plate to strengthen it.
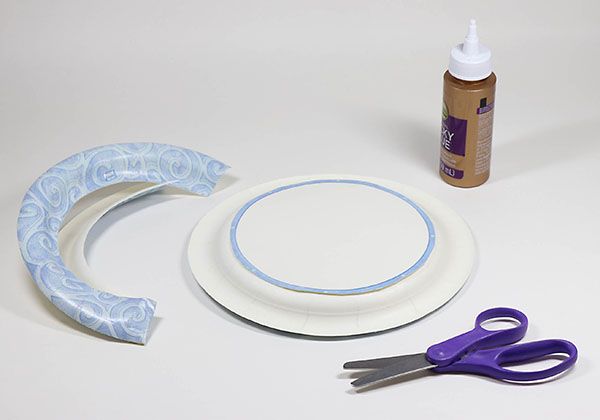
Step 6b: Center bird feeder on top of upside-down plate. Tape around bottom edges of bird feeder to secure its base together. Leave 1.5" (3.8 cm) tape-free under opening’s center.
Step 7: Draw tree bark texture with permanent markers.
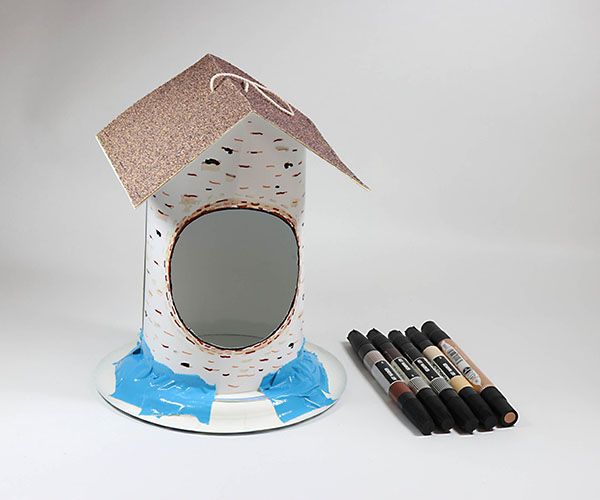
Step 8a: Cut out tape-free section of bird feeder’s base, from front edge of plate to where it meets cylinder.
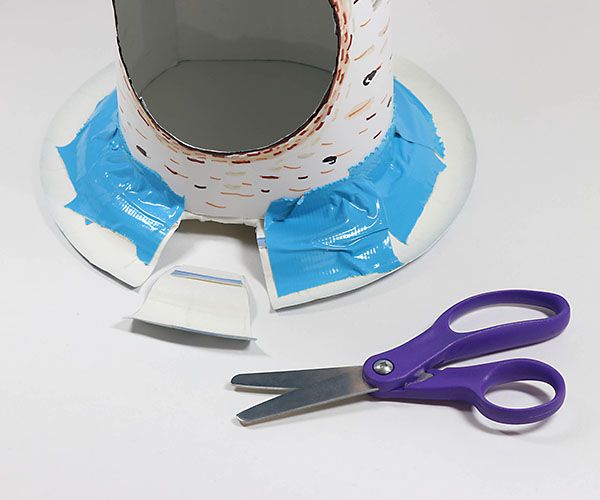
Step 8b: Under bird feeder, use tape to secure stick across plate, with extra length poking out for a front perch.
Step 9: Glue nature items such as moss or raffia to cover tape and plate on outside of bird feeder, leaving perch uncovered. Use spoon to add birdseed only onto plate portion inside feeder. Now it’s ready to hang!*
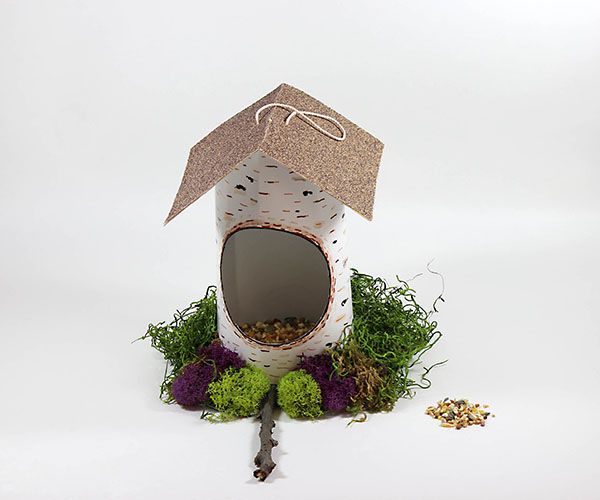
*Hang bird feeder within 3 feet (.9 m) of window to help protect birds from high-speed collisions. Keep feeder about 5 feet (1.5 m) above ground for safety from predators. Keep birdseed clean and dry.
For a printable version, download a PDF of this craft.
Characters493 Nur’s Nook100 Nur152 Crafts213 Birds53 Diversity131 Unity252 Stereotypes31 Race Unity223 Arts and Crafts223 Creativity296 Cultures141