Nur’s Nook: Create a Treasure Chest Gift
“Ye are My treasury, for in you I have treasured the pearls of My mysteries and the gems of My knowledge.”
–Bahá’u’lláh
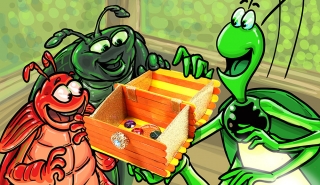
My awesome friends Onyx and Ruby are jewel beetles. Similar to sparkling gemstones, they come in amazing colors. They share their cool games and gadgets, too. But that’s not why I love them. I treasure them for their kindness and honesty. We have so much fun playing games and making art together!
My beetle buddies have a culture that’s different from my firefly family. Still, they listen to me, respect me, and encourage my creative interests. And I get super inspired learning about their traditions and crafts. The brilliant way they use color lights up my imagination!
To show my thanks, I made Ruby and Onyx a Treasure Chest Gift. Inside are photos, drawings, and souvenirs of our best memories.
What do you love about your friends? Create this gift to express what makes them shine!
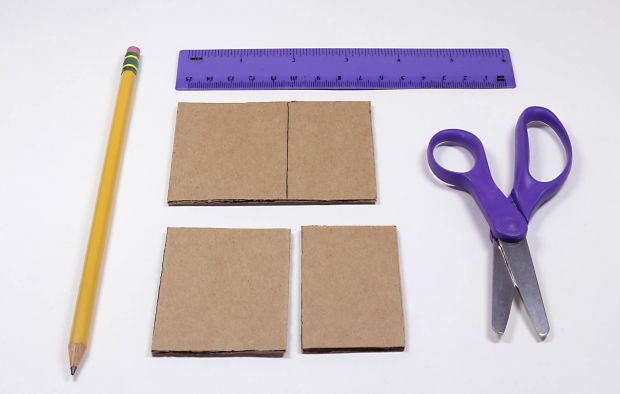
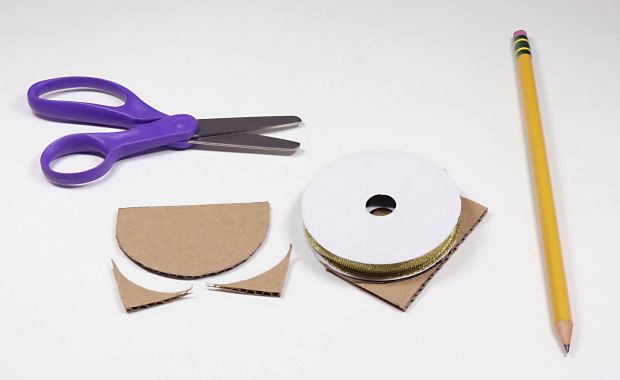
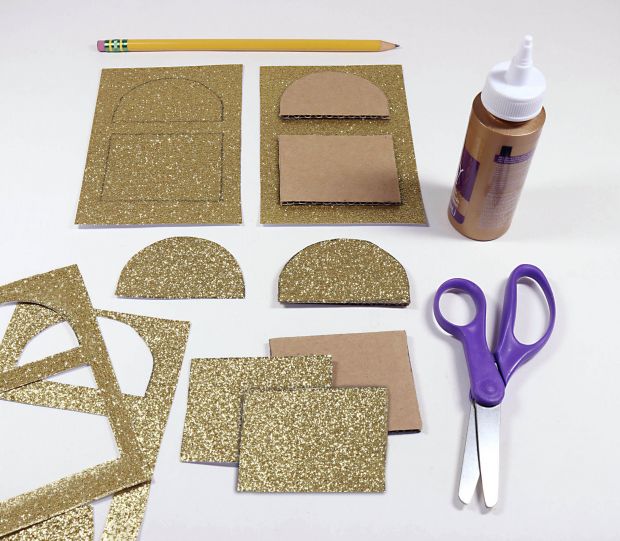
You’ll Need: 2 pieces of 3½" x 2½" (8.9 cm x 6.4 cm) sturdy cardboard, ruler, craft sticks, 2½" (6.4 cm) circle for tracing, pencil, decorative paper, tape, scissors, tacky glue, decorative bead, ½" (1.3 cm) wide ribbon, craft gems, small treasures (such as photos, drawings, or souvenirs that celebrate your friendship)
What You Do:
Step 1a: Draw a line across both pieces of cardboard that’s 2" (5.1 cm) from a short end. Cut along lines to make four rectangles.
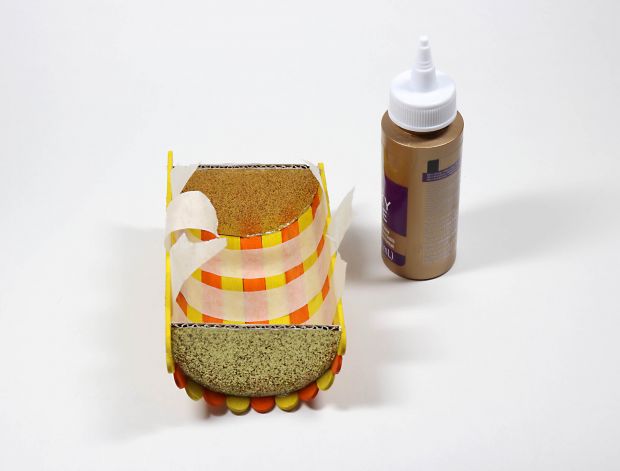
Step 1b: Place circle over a smaller rectangle so edges meet (on three sides). Use pencil to trace around it. Cut rounded corners off. Repeat for other rectangle.
Step 2: On paper, trace each cardboard shape twice. Cut out shapes and glue to front and back of cardboard pieces.
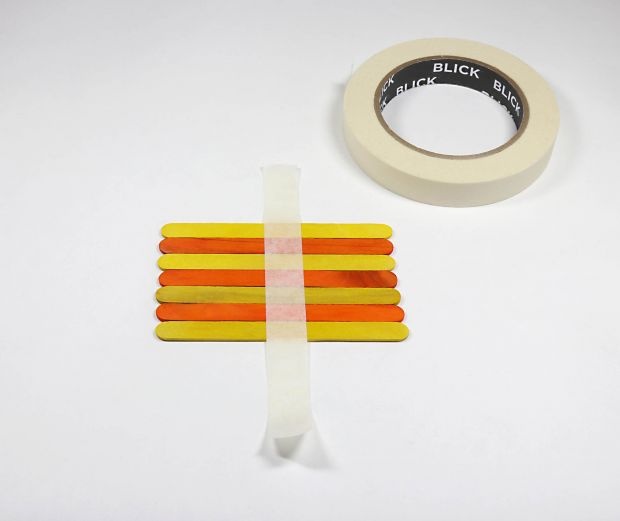
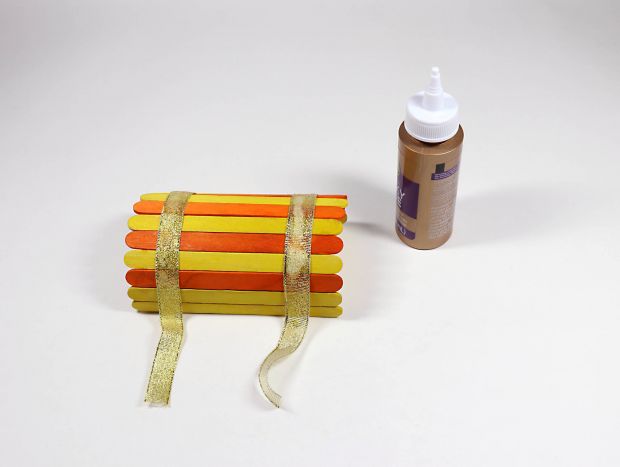
Step 3: Place seven sticks in an even row to form bottom of box. Tape across center to hold sticks in place.
Step 4: Cover one long edge of both cardboard rectangles with glue. Center each gluey edge ¼" (0.6 cm) from scalloped end of sticks. When dry, remove tape.
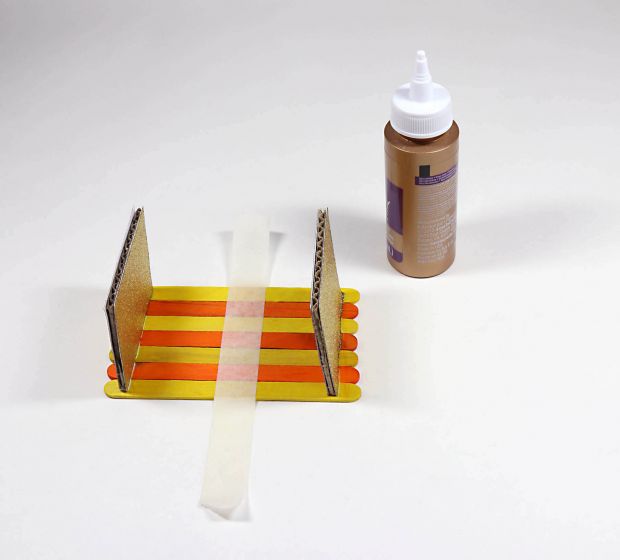
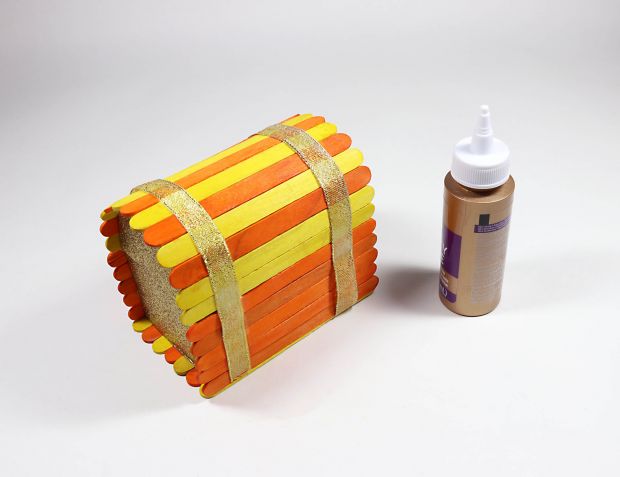
Step 5a: Turn bottom of box on its side so short ends of cardboard face upward. Glue five sticks centered on short edges of cardboard, to form a side of box. Let dry.
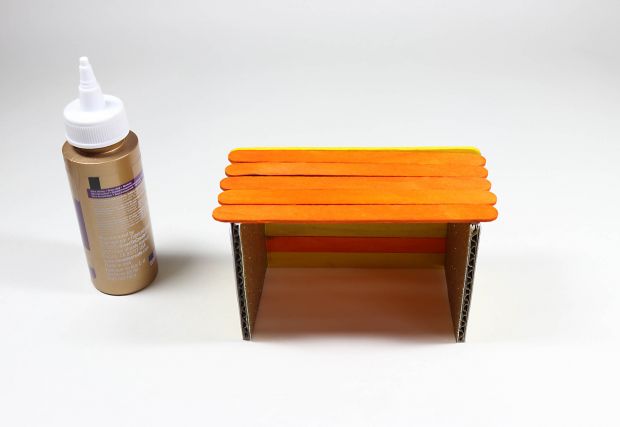
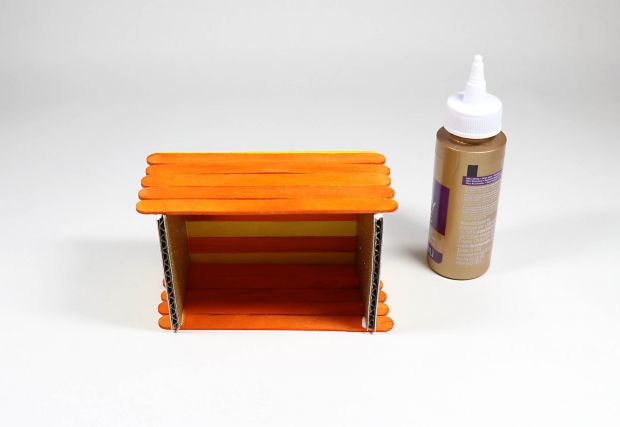
Step 5b: Turn box over and repeat Step 5 on opposite side.
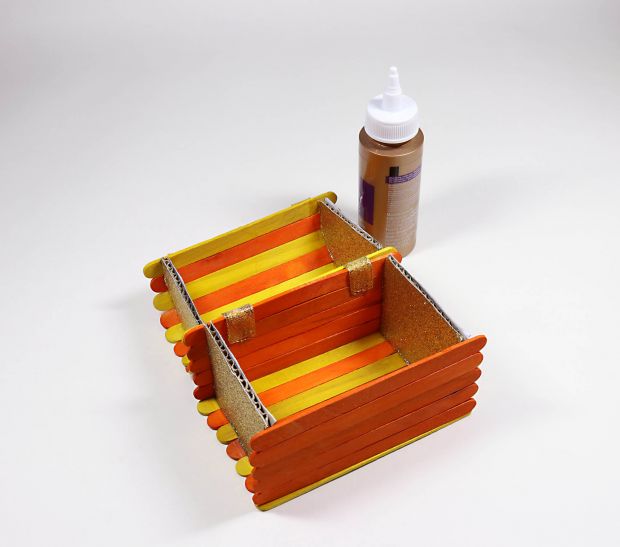
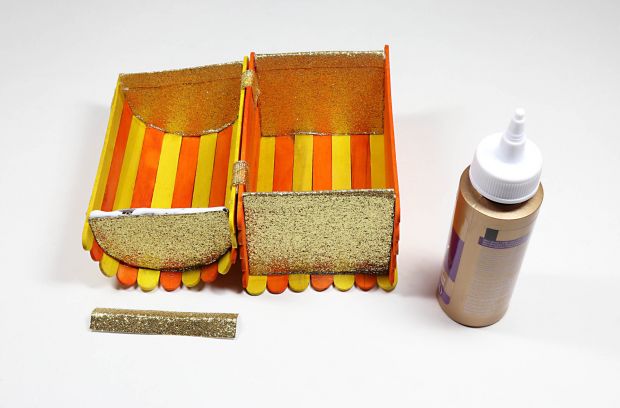
Step 6a: Place twelve sticks in an even row. Tape across center of row to secure sticks. Place two more tape pieces about ½" (1.3 cm) from central strip on each side.

Step 6b: Cover curved edge of each small cardboard piece with glue. Center each gluey edge upside down, ¼" (0.6 cm) from ends of sticks. Carefully wrap sticks around edges of both curves to form arced lid of chest. Cup hands underneath to support arc. When dry, remove tape.
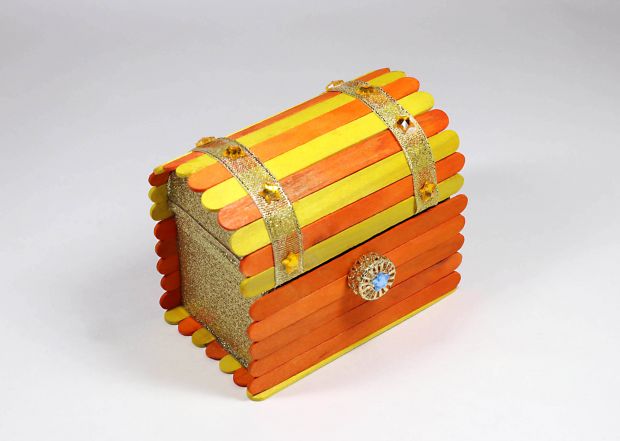
Step 7: Glue two 7" (17.8 cm) pieces of ribbon around lid’s top, about 1" (2.5 cm) from each side. Make sure extra lengths of ribbon hang over same side.
Step 8a: Fit lid on top of chest’s bottom. Trim or press cardboard edges a bit for closure, if needed. Glue extra lengths of ribbon along back of box as a hinge to attach lid. Let dry.
Step 8b: Open lid. Glue two pieces of 1½" (3.8 cm) ribbon inside box to reinforce hinge. Let dry.
Step 9: Glue ½" x 2½" (1.3 x 6.4 cm) paper strips to cover exposed cardboard edges.
Step 10: Glue bead to top center of box’s bottom and decorate box with gems. Fill with treasures (such as photos, drawings, or souvenirs) that honor your friendship. Give as a gift to your friend!

For a printable version, download a PDF of this craft
Characters493 Nur152 Nur’s Nook100 Arts & Crafts25 Crafts213 Treasures6 Friendship186 Friends209 Gifts28 Gems6 Creativity296 Arts84